AI has democratised writing code. Pretty much anyone can pull up ChatGPT or Claude and build basic apps and websites. What people fail to realise is that writing code is just a small part of being a developer. Indeed, in most software engineer roles, writing code is one of the things you spend the least time on! While AI now means anyone can write code, there is fundamental software development knowledge still missing, and you don’t know what you don’t know.
Building functional apps at speed is difficult, but there are ways you can make it easier for yourself so that you can go from idea to demo as quickly as possible. Let’s go over some problematic patterns and find better approaches.
Developing at Speed
The Pattern:
A Vibe Coder uses AI tools only in the browser, so the agent does not have access to local files. This means repetitive copying and pasting into browser windows, which is annoying and slow. The agent also cannot see anything outside of the code you copy and paste into it.
Having an agent that directly interacts with your system is such a massive improvement to your development workflow. Finally, the agent can act on its own rather than just telling you what to do. Writing and editing are now so much faster, and when the agent gives you just a small snippet of code, you don’t have to struggle to figure out where it’s supposed to go.
The agent now sees all files in your project, which is a massive boon when the task at hand becomes sufficiently complex. This solves the issue of the agent making changes in a vacuum, with no idea about how the code will be used or in what context. The changes made will be more likely integrate with other pieces of your project. The agent can now also evaluate not only the correctness of code, but the architecture of the entire project, leading to improvements in speed, readability, modularity and complexity. It now even has the power to reorganise your projects for you.
A local agent is much better at debugging, now that it can actually run commands on your machine. It can read logs, helping you find those tricky bugs. Its investigative powers also increase by magnitudes. When having issues with deploying my applications, I have literally told an agent, “You have permission to connect to my cloud server and investigate as you wish” (of course, not giving him permission to actually change stuff), and the results have been startlingly good. Agents are able to comb through data and spot typical failure patterns that might be unknown to you so quickly.
But how do you get access to these types of tools? First things first, you must be using an IDE, like VSCode, to develop your code (or Vim if you are feeling adventurous!). An IDE is simply a tool to edit code, which comes with a lot of helpful functionality, such as highlighting syntax errors and auto-formatting. You can install AI plugins for VSCode, like OpenAI’s Agent or Microsoft’s Copilot. Any agent you think of probably has a plugin for every major IDE. If you prefer a separate interface, check out Claude Code. I prefer to develop from the terminal, so opencode is my AI tool of choice.
Of course, the caveat of this approach is it’s main advantage; The agent has the power to change things at their whim. I often find that a good approach is to tell the agent explicitly not to edit things, to create a plan before making changes, and to always ask for permission before every change. A lot of interfaces have a way to change between ‘plan’ and ‘build’ modes, so make use of this as much as you can.
Still, it’s risky to let an agent run loose in your codebase, which is why it’s so important to have a way to undo changes if things get a little too crazy!
Saving Your Progress
The Pattern:
Your project is going great, you have reached a significant milestone, and you are happy with the current result. You ask for a change, but the result isn’t what you need, so you ask the agent to tweak and tweak but the result is still poor. You ask the agent to undo all recent changes, but it doesn’t do it well. Everything that was working doesn’t work anymore! Now you are really in a mess, and can’t resolve the situation, so you throw the whole project out and start again.
You have learn how to save your progress. If not, }you are doomed to take your code down rabbit holes you may never recover from. The way to do this is using Git.
Git is synonymous with software development; indeed, there are probably very few mainstream development practices that do not use it. It’s really the bread and butter for which the majority of code is propped up by. There are so many great Git tutorials just a Google search away so I’ll just focus on the ‘why’ in this article. In its simplest form, Git is a version control tool. This means you can manually save exactly how your project is at a point in time, which is known as making a commit. The best thing about this is that all changes are tracked. You can see the history of changes, and if you name each commit well, you’ll be able to quickly understand exactly what each commit changed. With each commit, you can also see exactly what code modifications were made. You can now also rollback to any previous version of the code, should you not like the direction the project has gone in. Found a recent commit broke something? Just roll back to the previous one!
Git is also very powerful because it lets you develop on ‘branches’. Let’s say you want to develop a feature that might take a good chunk of work. You can create a new branch, which essentially is a new ’track’. All changes on that branch do not affect anything in the main branch, and once you have finished the feature, you can simply merge the feature branch into the main branch. This frees you from worrying about messing up your project when experimenting, and you are also not forced to finish a feature in a single sitting. You can keep the working version of your app intact until the new feature is ready to go.
Of course, effective use of Git requires that you save your work frequently. Every small change should be saved so that it’s easy to rollback without losing a lot of work, and bugs will be easier to track down. In software development, we praise atomicity. Tasks should be broken down into small chunks, and using git in this way, with every commit being just a single small change, keeps things moving and keeps overhead low. If you know which commit introduced a bug, and that commit only changed a couple of lines rather than hundreds, you just made your life a lot easier.
Tracking What The Agent Has Changed
The Pattern:
Your agent makes a change that edits some unrelated code, but you don’t know exactly what and where! If only there was a way to see changes.
Something you get for free with Git is something called a ‘Git diff’. Not only can you compare exactly what changed from commit to commit, but also, before you decide to commit, you can see the current unsaved changes.
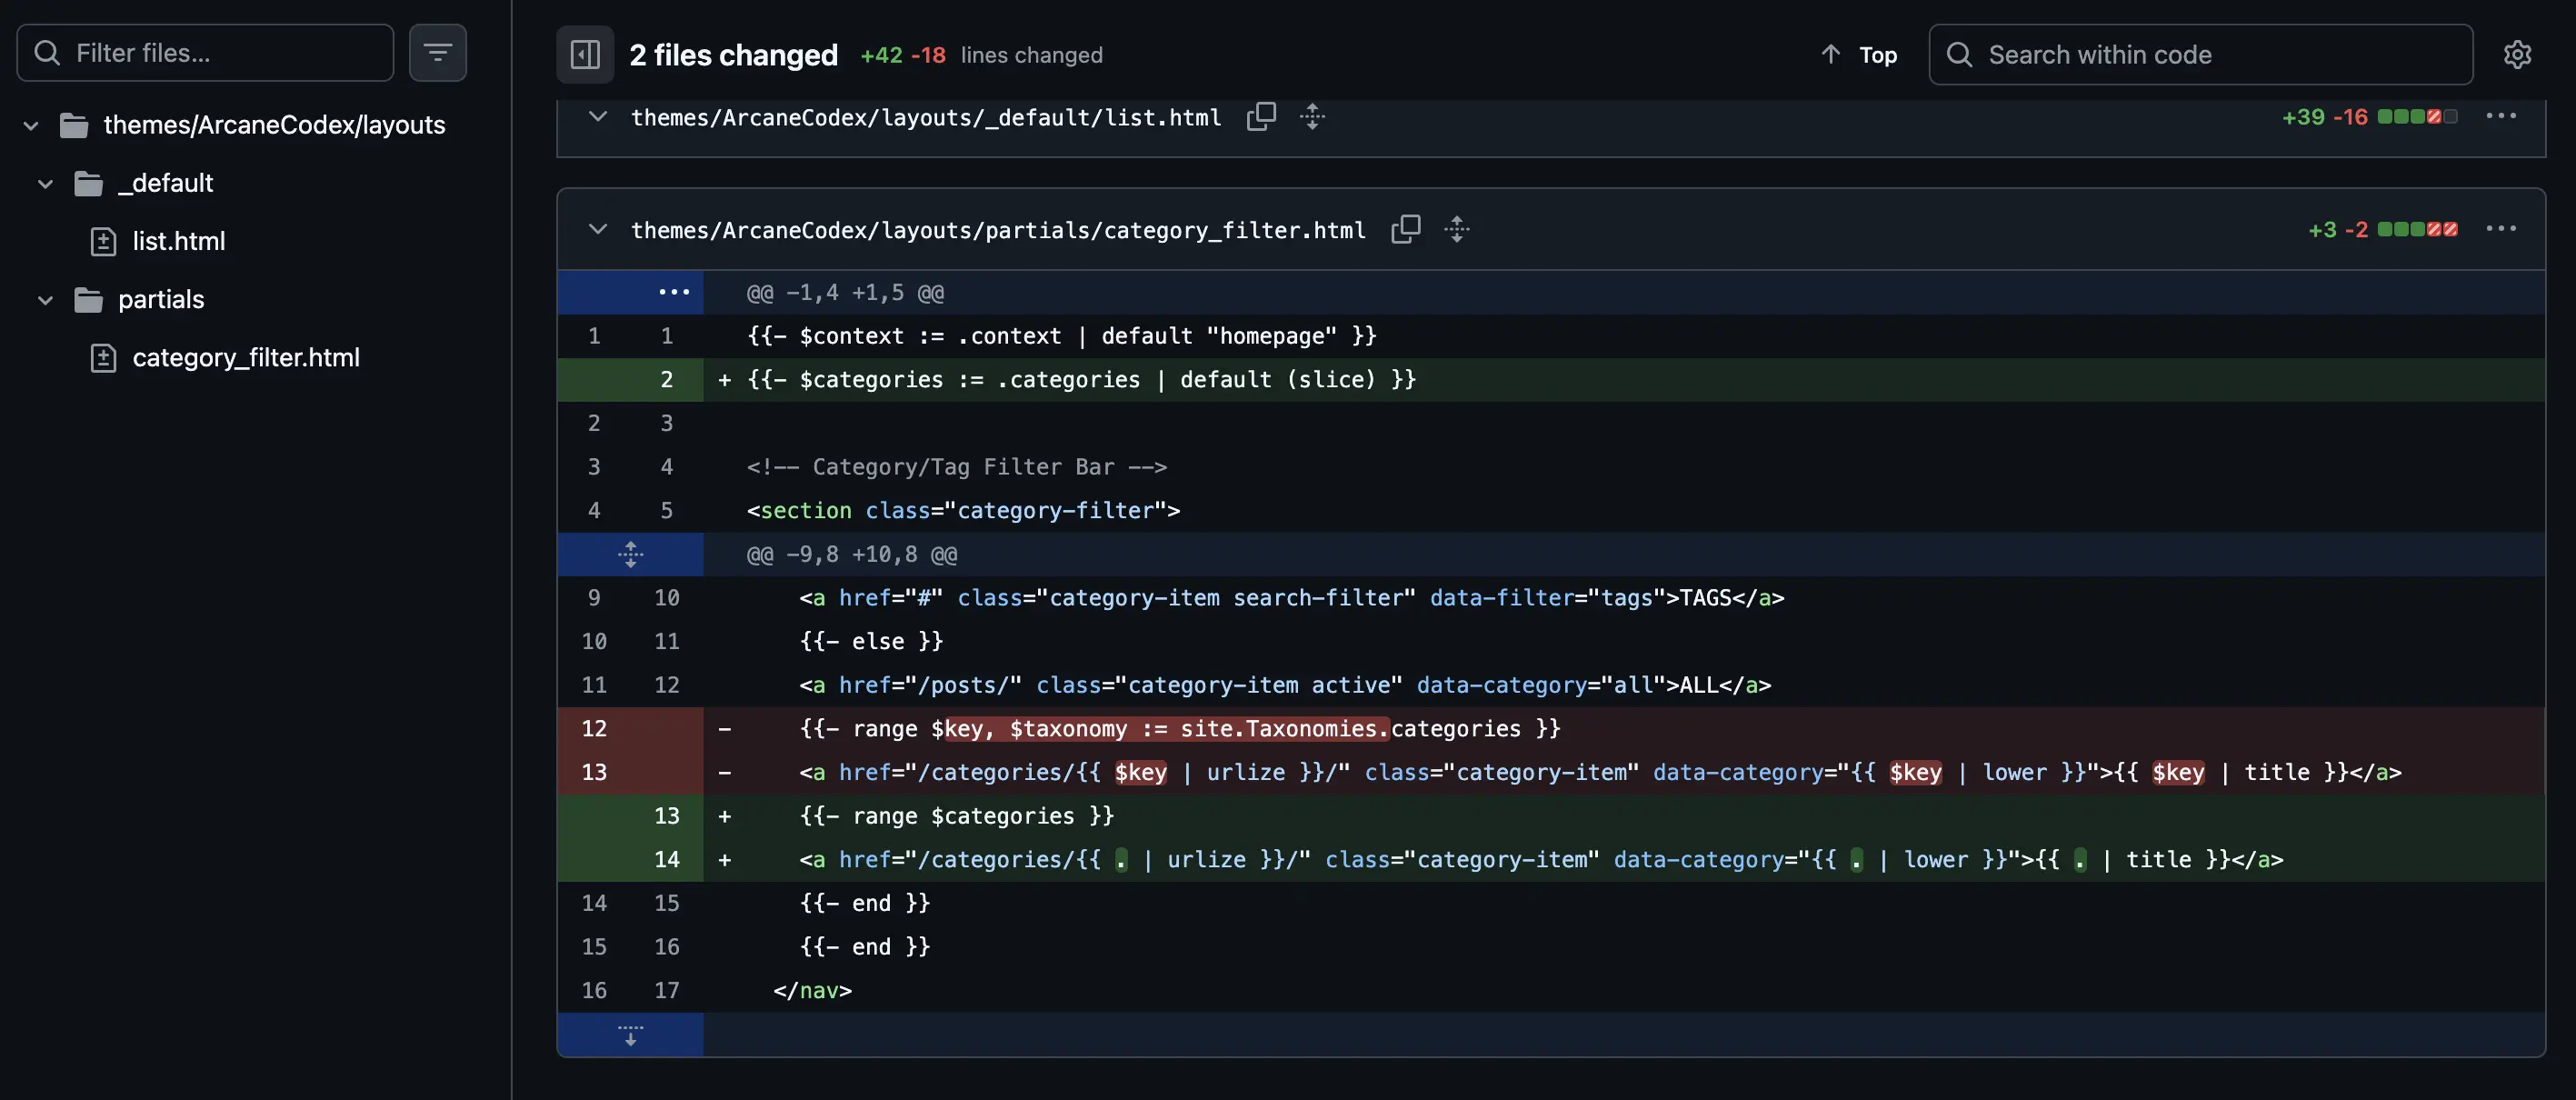
An example of a Git diff
As you can see in the above image, it’s very easy to see what changed in this commit (green for additions and red for removals). This is powerful because you can see the exact changes the agent has made and verify them for yourselves, without having to manually compare two versions of the file!
Keeping on Track
The Pattern:
You spend a lot of time working on your app, but it is not progressing at the rate you would like. You often find yourself spending a lot of time on features that don’t really matter, and finding that you don’t know what to prioritise.
Agile development is a methodology that prioritises flexibility and delivering value in short bursts, and Kanban Boards are one of it’s defining features. A Kanban board is a way to track tasks. Essentially, every major task needs to be broken down into small chunks (in line with the atomicity mindset we mentioned above). Once this is done, you can create a ‘card’ for each task. The position of a card on the board indicates its status. Initially, all cards start out in the ’to-do’ column. Once you start work on a task, it moves into the ‘in progress’ column. When the task is finished, you can move it into the ‘done’ column. There can be more sections if your processes need to be more complex, but this is enough to start with. Tracking tasks like this gives you a good snapshot of the current state of the project.
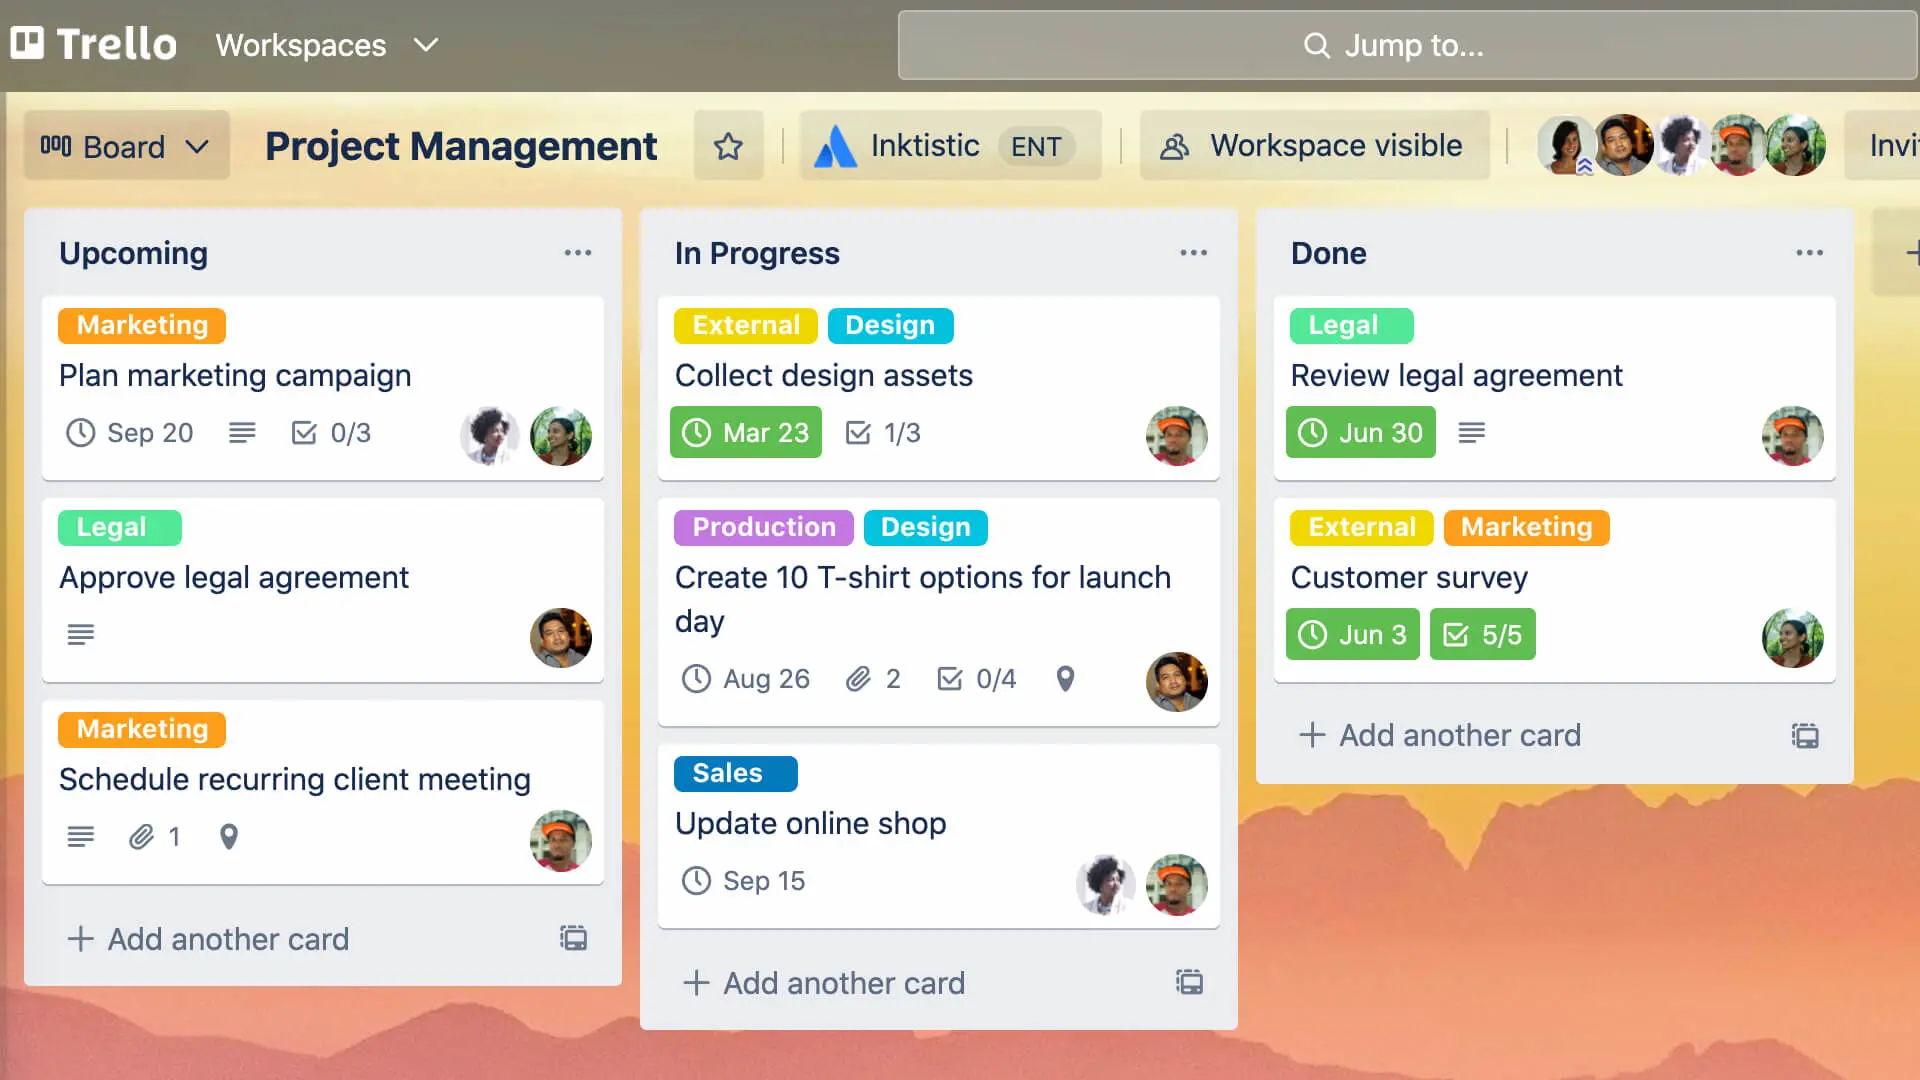
A Kanban board showing some example tasks.
Bursts of work are broken down into time periods known as ‘sprints’. The length of a sprint is variable, but is usually a week or two. Before starting a sprint, you have to decide what the key tasks are that you wish to accomplish during this time. Select the tasks that align with this sprint objective and place them into the to-do section, and get to work! Now your workflow is observable, guided and time-bounded, leading to more focused work and better results. Stick to the tasks you selected at the start of the sprint as much as possible. At the end of the sprint, you can reflect on your progress, giving you insight into planning the next sprint.
Hopefully, this will help you avoid the “shiny-object syndrome”, staying focused on what matters the most for your project. You can use platforms like Trello to create Kanban boards
Now you have made great progress on your app, and are ready to show the world, but what now?
Getting It Out There
The pattern:
You have finally created your app and want to share it with the world. What do you do now?
There is a common joke amongst budding software developers saying their project is available at ’localhost’! Just because your project is running on your machine, it doesn’t mean anybody can access it. There are so many ways to host your project, but the easiest way for a beginner is probably to use a service like Render. I won’t dwell on this for too long, as their documentation is very good and the positive outcome is obvious!
Go Forth!
Hopefully you now understand how to better leverage AI tools to build your application. Code is just one aspect, but your workflow and development principles are just as important for rapidly creating applications that provide value. Go forth and get building!